Configuration of AFS for
use with DNS
The systems team recently introduced the concept of letting a
DNS server determine the AFS database servers via the
AFSDB RR. While this has been practiced quite widely elsewhere,
we are now introducting this to BII.
If this means Greek to you, its ok. What this
means for the layman, is, that for the future, there will be zero
configuration changes with regards to AFS database
servers on the client side, that is what we are aiming to achieve.
This means, that if the network configuration of
any of the AFS servers decide to change, we can erect a new one with
the same name without asking your permission to
change the configuration files.
Disclaimer: That is provided
that we don't change the DNS server itself.
Using AFS to use with DNS:
On Linux platforms (presumably
Debian based):
- Locate where your CellServDB is. On most
systems it is likely to be /etc/openafs, on others, it might be
/usr/local/etc/openafs.
- Log on as root, on debian based, its 'sudo su', on
redhat based, 'su -'.
The following commands
are assumed that
you have been logged in with root access.
- Make a backup of your CellServDB.
And create a
blank one.
cd <CellServDB> directory

cp CellServDB CellServDB.bak

rm -rf CellServDB

touch CellServDB
- Make sure that your 'ThisCell' file
reads
'bii.a-star.edu.sg', the AFS cell of BII.
- And make sure
your afsd client program
starts with these flags:
- -
afsdb [this makes afsd use the DNS AFSDB RR flag, set on the DNS
records for the AFS DB servers]
- - fakestat [Return fake values for
stat calls on cross-cell mounts. This option makes an "ls -l" of /afs
much faster since each cell isn't contacted.]
- Reboot.
On Windows:
- Your CellServDB is in C:\Program
Files\OpenAFS\Client\
- Make a backup copy of your CellServDB.
- Delete and create a blank copy of CellServDB by
using Notepad or any other TEXT editor.
- Launch your OpenAFS client.
Click on the 'Advanced'
tab.

- Click on the 'AFS Client Configuration' button.
Make sure the
cell name is shown to be 'bii.a-star.edu.sg'.

- Reboot.
In case of trouble after
rebooting:
On Linux
platforms:
-
As root, cd /var/cache/openafs and remove everything there.
Restart your afs client or reboot.
On Windows:- WARNING: This is
a TRICKY PROCEDURE. So do this with much CARE.
If unsure, please ask the systems team for help.
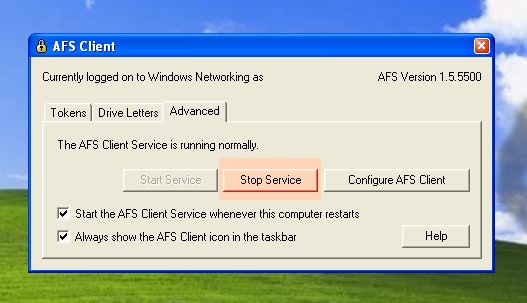
- Go
to
the 'Advanced' tab illustrated earlier. Stop the afs client service by
clicking the button
highlighted.
- Launch
regedit via the 'Run' dialog or a command
line.
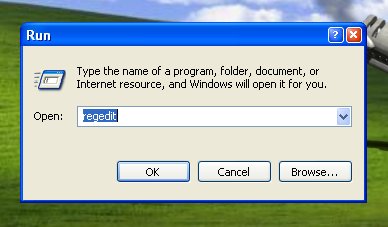
- Locate
the key under the hierarchy:
My
Computer\HKEY_LOCAL_MACHINE\SOFTWARE\OpenAFS\Client\Freelance
In
there delete all its binary values from 0-3.

Do
not close the registry editor yet.
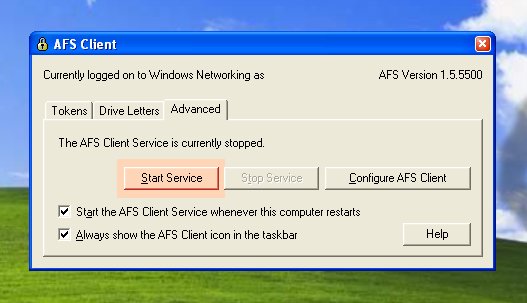
- Restart the
AFS client
service by going to the 'Advanced' tab and clicking on the button
highlighted.
- The
AFS client wizard will prompt you to enter the
cell information and username credentials again.
- Go
through with it and complete it accurately. Our BII cell
name is 'bii.a-star.edu.sg'.
- Thereafter, check the registry editor, you should
see that 3 binary keys are recreated.
- Log in to AFS by
obtaining tokens.
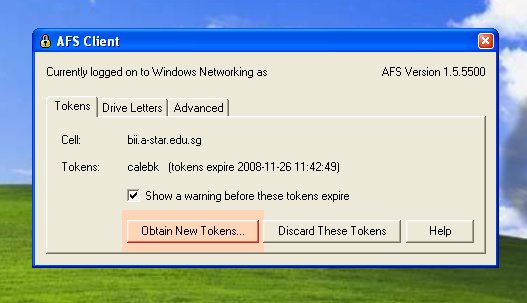
- Verify
this with your afs mounted drives that you
are able to see them.